Connect Your Facebook Conversions API with Stape.io
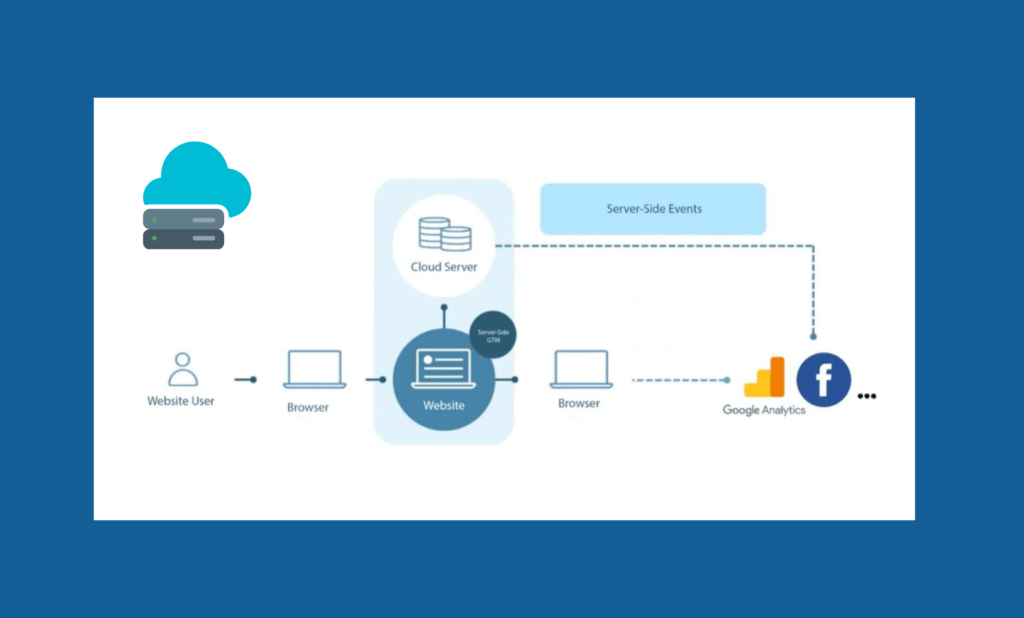
The Facebook Conversions API (CAPI) is an essential tool for advertisers looking to send server-side event data directly to Facebook’s servers. By implementing CAPI, businesses can track conversions more accurately, improve ad performance, and ensure reliable data transfer even when browser-based tracking is limited.
Stape.io simplifies the setup of Facebook CAPI by offering managed solutions for server-side tracking. In this guide, we’ll show you how to connect Facebook CAPI to Stape.io seamlessly.
Benefits of Using Stape.io for Facebook CAPI
- Ease of Setup: Stape.io provides pre-built templates, making it quick and easy to configure.
- Improved Data Accuracy: With server-side tracking, data is sent directly from your server, bypassing ad blockers and browser restrictions.
- Cost-Effective Hosting: Stape.io’s managed services eliminate the need for expensive server infrastructure.
- Enhanced Performance: Accurate event tracking improves the performance of your Facebook ads.
Step-by-Step Guide to Connect Facebook CAPI with Stape.io
Follow these steps to integrate Facebook Conversions API with Stape.io:
1. Create a Stape.io Account
If you haven’t already, sign up for Stape.io and log in to your account.
2. Set Up a New Container
- Once logged in, go to the dashboard and click on “Add Container.”
- Select “Server” as the container type.
- Provide a name for the container and click “Create.”
3. Deploy the Server-Side GTM Container
- Download the Google Tag Manager (GTM) server container from Stape.io.
- Import the container into your GTM account.
- Navigate to GTM > Admin > Import Container.
- Upload the container file from Stape.io and choose your workspace.
- Publish the container in GTM.
4. Connect Facebook CAPI in GTM
- In your GTM container, click on “Tags” and create a new tag.
- Choose the “Facebook CAPI” tag template.
- Enter your Facebook Pixel ID and Access Token:
- You can find the Pixel ID in your Facebook Events Manager.
- Generate an Access Token in the Facebook Business Settings under the “Conversions API” section.
- Configure the tag triggers to match the events you want to track (e.g., Page View, Add to Cart, Purchase).
- Save and publish the tag.
5. Configure Stape.io Settings
- In the Stape.io dashboard, go to your container settings.
- Link your custom domain or use the provided Stape.io subdomain for your server-side tracking.
- Add the necessary DNS records to connect your domain to Stape.io.
- Enable the Facebook CAPI integration.
6. Test Your Setup
- Use the Facebook Test Events Tool to verify that events are being sent successfully.
- Trigger events on your website and check if they appear in the Test Events Tool.
- Resolve any errors to ensure accurate data tracking.
Why Choose Stape.io for Facebook CAPI?
Stape.io streamlines the process of implementing server-side tracking for Facebook CAPI. It’s user-friendly, reliable, and cost-effective, making it an excellent choice for businesses of all sizes. By using Stape.io, you can focus on optimizing your campaigns instead of dealing with complex server configurations.
Ready to enhance your Facebook ad tracking? Sign up for Stape.io today and take your advertising to the next level!
Conclusion
Connecting Facebook Conversions API with Stape.io is a straightforward process that can significantly improve your ad performance and data accuracy. With Stape.io’s managed hosting solutions, you can easily implement server-side tracking without the technical hassle. Follow the steps outlined above, and start leveraging the power of Facebook CAPI today!

